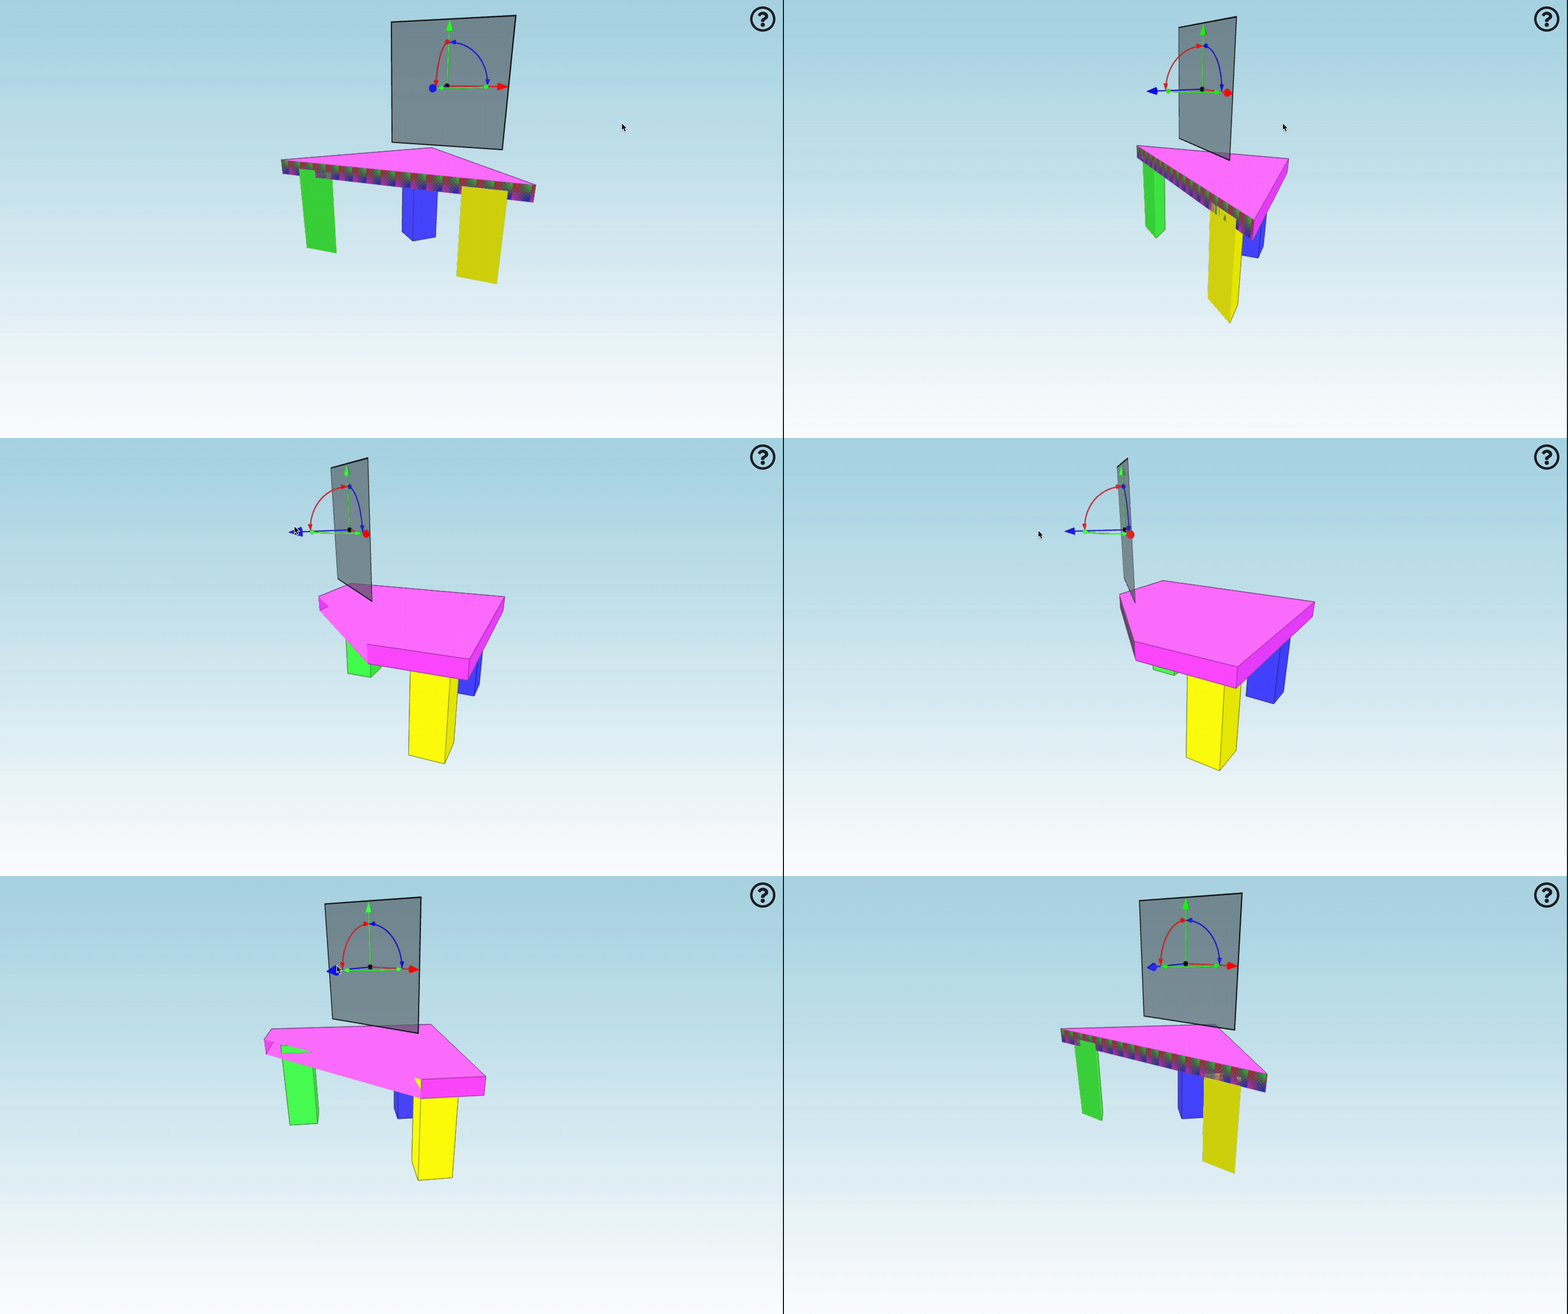
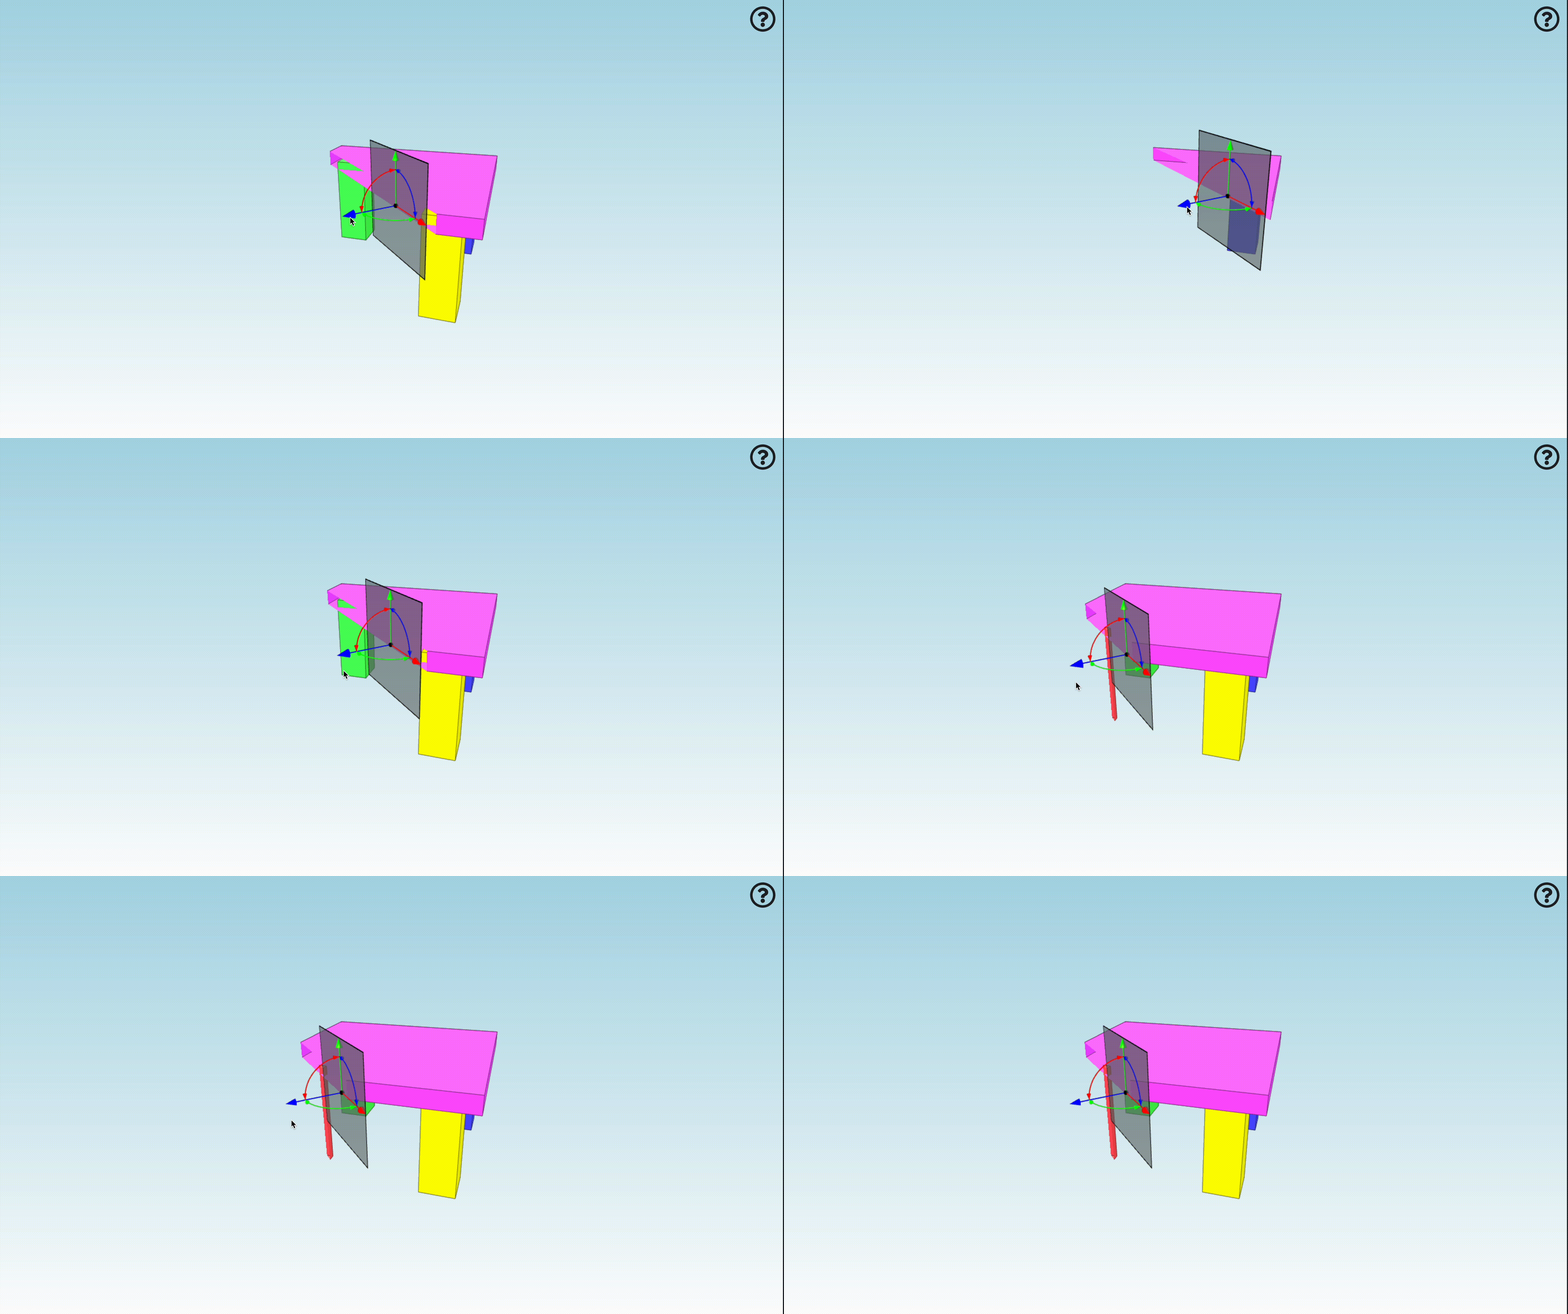
Hatching sliced objects using xeokit SDK
In this blog, you’ll be learning how to add hatching to sliced models using our powerful BIM xeokit SDK. Whether you’re creating architectural visualisations or complex engineering models, adding hatching to sliced sections can greatly enhance the clarity and visual appeal of your viewer.

We will walk you through the process of setting up your project, slicing the models, and applying hatching effects to those slices.
By the end of this guide, you’ll be able to:
- Set up a basic BIM viewer using xeokit SDK.
- Slice models dynamically to reveal internal structures.
- Apply solid hatching to the sliced surfaces for improved visual representation.
Let’s dive right in and start with setting up the basic HTML structure for our example.
Setting Up the HTML Structure
To begin, we need a simple HTML structure that will serve as the foundation for our BIM viewer. Below is the HTML code we’ll be using:
<!doctype html>
<html>
<head>
    <meta charset="utf-8">
    <meta http-equiv="X-UA-Compatible" content="IE=edge,chrome=1">
    <meta name="viewport" content="width=device-width, initial-scale=1">
    <title>xeokit Example</title>
    <link href="../css/pageStyle.css" rel="stylesheet"/>
    <script src="https://cdnjs.cloudflare.com/ajax/libs/font-awesome/5.13.0/js/all.min.js"></script>
</head>
<body>
  <canvas id="myCanvas"></canvas>
</body>
</html>
In this setup, we’ve created a simple web page with a canvas element where our BIM model will be rendered. This basic structure is all we need to get started with our example.
Setting Up the Viewer and Creating a Simple Table
Now that we have our HTML structure in place, let’s move on to setting up the viewer and creating a basic table model using the xeokit SDK. This example will help you understand how to initialise the viewer and add a simple model to it. While we’ll be creating a table model here, the core focus of this blog is not on model creation but rather on how to work with sliced models and hatching.
Importing the Viewer and SceneModel
First, let’s import the necessary classes from the SDK:
import { Viewer, SceneModel } from "../../dist/xeokit-sdk.min.es.js";
Initialising the Viewer
Next, we’ll set up our viewer by specifying the canvas element and a few basic properties:
const viewer = new Viewer({
    canvasId: "myCanvas",
    transparent: true,
    readableGeometryEnabled: true,
});

viewer.scene.camera.eye = [-21.80, 4.01, 6.56];
viewer.scene.camera.look = [0, -5.75, 0];
viewer.scene.camera.up = [0.37, 0.91, -0.11];
Here, we are creating a new Viewer instance and linking it to our canvas element. An important thing to note is that we are setting readableGeometryEnabled to true while creating our viewer instance, because by default, xeokit viewer does not store the information about an object’s geometry and this information is required for SectionCapsPlugin to work. By setting readableGeometryEnabled to true, we are explicitly asking the viewer to store the geometry information for the models on the scene.
The camera settings are adjusted to provide a good initial viewer of the model.
Creating a Simple Table Model
To demonstrate how the xeokit SDK works, we’ll create a basic table model. This step is straight forward and primarily serves as a setup for the slicing and hatching we’ll do later.
const sceneModel = new SceneModel(viewer.scene, {
    id: "table",
    isModel: true,
    position: [0, 0, 0],
    scale: [1, 1, 1],
    rotation: [0, 0, 0],
    edges: true,
});

sceneModel.createGeometry({
    id: "myBoxGeometry",
    primitive: "solid",
    positions: [
        1, 1, 1, -1, 1, 1, -1, -1, 1, 1, -1, 1, 1, 1, 1, 1, -1, 1, 1, -1, -1, 1, 1, -1, 1, 1, 1, 1, 1, -1, -1, 1,
        -1, -1, 1, 1, -1, 1, 1, -1, 1, -1, -1, -1, -1, -1, -1, 1, -1, -1, -1, 1, -1, -1, 1, -1, 1, -1, -1, 1, 1,
        -1, -1, -1, -1, -1, -1, 1, -1, 1, 1, -1
    ],
    indices: [
        0, 1, 2, 0, 2, 3,            // front
        4, 5, 6, 4, 6, 7,            // right
        8, 9, 10, 8, 10, 11,         // top
        12, 13, 14, 12, 14, 15,      // left
        16, 17, 18, 16, 18, 19,      // bottom
        20, 21, 22, 20, 22, 23
    ],

});

sceneModel.createMesh({
    id: "redLegMesh",
    geometryId: "myBoxGeometry",
    position: [-4, -6, -4],
    scale: [1, 3, 1],
    rotation: [0, 0, 0],
    color: [1, 0.3, 0.3],
});

sceneModel.createEntity({
    id: "redLeg",
    meshIds: ["redLegMesh"],
    isObject: true,
});

sceneModel.createMesh({
    id: "greenLegMesh",
    geometryId: "myBoxGeometry",
    position: [4, -6, -4],
    scale: [1, 3, 1],
    rotation: [0, 0, 0],
    color: [0.3, 1.0, 0.3]
});

sceneModel.createEntity({
    id: "greenLeg",
    meshIds: ["greenLegMesh"],
    isObject: true,
});

sceneModel.createMesh({
    id: "blueLegMesh",
    geometryId: "myBoxGeometry",
    position: [4, -6, 4],
    scale: [1, 3, 1],
    rotation: [0, 0, 0],
    color: [0.3, 0.3, 1.0]
});

sceneModel.createEntity({
    id: "blueLeg",
    meshIds: ["blueLegMesh"],
    isObject: true,
});

sceneModel.createMesh({
    id: "yellowLegMesh",
    geometryId: "myBoxGeometry",
    position: [-4, -6, 4],
    scale: [1, 3, 1],
    rotation: [0, 0, 0],
    color: [1.0, 1.0, 0.0]
});

sceneModel.createEntity({
    id: "yellowLeg",
    meshIds: ["yellowLegMesh"],
    isObject: true,
});

sceneModel.createMesh({
    id: "purpleTableTopMesh",
    geometryId: "myBoxGeometry",
    position: [0, -3, 0],
    scale: [6, 0.5, 6],
    rotation: [0, 0, 0],
    color: [1.0, 0.3, 1.0]
});

sceneModel.createEntity({
    id: "purpleTableTop",
    meshIds: ["purpleTableTopMesh"],
    isObject: true,
});
Adding Section Planes to Slice the Model
With our viewer set up and a simple table model in place, it’s time to introduce section planes. Section planes allow us to slice through the model reveal its internal structures. In this step, we’ll add a section plane and set up controls to manipulate it.
Updating the Import statement
First, we need to update our import statement to bring in additional tools from the SDK that will help us create and control section planes:
import { Viewer, SceneModel, SectionPlanesPlugin, math } from "../../dist/xeokit-sdk.min.es.js";
Initialising the SectionPlanesPlugin
Next, we’ll initialise the SectionPlanesPlugin, which provides the functionality to create and manage section planes within our scene:
const sectionPlanes = new SectionPlanesPlugin(viewer, {
    overviewCanvasId: "mySectionPlanesOverviewCanvas",
    overviewVisible: true,
});
Creating a Section Plane
Now that the plugin is set up, let’s create a new section plane. A section plane is defined by its position and direction. We’ll create a plane that slices through our table model:
const sectionPlane = sectionPlanes.createSectionPlane({
    id: "mySectionPlane",
    pos: [0.5, 2.5, 5.0],
    dir: math.normalizeVec3([1.0, 0.01, 1])
});
In this example, we're positioning the plane at [0.5, 2.5, 5.0] and giving it a direction vector of [1.0, 0.01, 1]. The direction vector is normalised using the math.normalizeVec3 function to ensure it's a unit vector.
Displaying Controls for the Section Plane
Finally, we’ll enable controls for the section plane so that it can be transformed interactively:
sectionPlanes.showControl(sectionPlane.id);
By calling showControl, we’re displaying transformation controls for the section plane, allowing you to translate, rotate and adjust the plane as needed.

Hatching Sliced Models with Section Caps
Now that we have section planes in place, it’s time to add hatching to the sliced sections of our model. Hatching is a great way to enhance the visual distinction of cut surfaces, making the internal structure of your models more understandable at a glance. Applying materials to section caps is straightforward and flexible.
Applying Materials to Section Caps
To add hatching or any visual treatment to your sliced sections, you simply need to assign a material to the capMaterial property of your SceneModelEntity. This material will automatically appear on the cut surfaces when the model is sliced by section planes.
Important Note: Only entities that have a material assigned to their capMaterial property will display hatching on their section caps. Entities without a capMaterial will not show any hatching when sliced.
Here's how you can apply a basic coloured material to section caps:
const entity = sceneModel.createEntity({
    id: "myEntity",
    meshIds: ["myMesh"],
    isObject: true,
});

// Apply a material to the section caps
entity.capMaterial = new PhongMaterial(viewer.scene, {
    diffuse: [1.0, 0.3, 1.0],
    backfaces: true
});
Using Textured Materials for Enhanced Hatching
You can also apply textured materials to create more sophisticated hatching patterns. This is particularly useful for creating traditional architectural hatching effects:
entity.capMaterial = new PhongMaterial(viewer.scene, {
    diffuse: [1, 1, 1],
    backfaces: true,
    diffuseMap: new Texture(viewer.scene, {
        src: "../../assets/textures/diffuse/uvGrid2.jpg",
        encoding: LinearEncoding
    })
});
Flexibility in Material Types
The beauty of this approach is its flexibility. You can use any type of material for your section caps:
- Solid colours for simple visual distinction
- Textured materials for traditional hatching patterns
- Custom materials with specific properties like transparency or reflectance
Complete Working Example
Here's a complete example that demonstrates creating a table model with section caps and hatching:
import {Viewer, SceneModel, SectionPlanesPlugin, PhongMaterial, Texture, LinearEncoding, math} from "../../dist/xeokit-sdk.min.es.js";

const viewer = new Viewer({
    canvasId: "myCanvas",
    transparent: true,
    readableGeometryEnabled: true,
});

viewer.scene.camera.eye = [-21.80, 4.01, 6.56];
viewer.scene.camera.look = [0, -5.75, 0];
viewer.scene.camera.up = [0.37, 0.91, -0.11];

const sceneModel = new SceneModel(viewer.scene, {
    id: "table",
    isModel: true,
    position: [0, 0, 0],
    scale: [1, 1, 1],
    rotation: [0, 0, 0],
    edges: true,
});

// Create shared box geometry
sceneModel.createGeometry({
    id: "myBoxGeometry",
    primitive: "solid",
    positions: [
        1, 1, 1, -1, 1, 1, -1, -1, 1, 1, -1, 1, 1, 1, 1, 1, -1, 1, 1, -1, -1, 1, 1, -1, 1, 1, 1, 1, 1, -1, -1, 1,
        -1, -1, 1, 1, -1, 1, 1, -1, 1, -1, -1, -1, -1, -1, -1, 1, -1, -1, -1, 1, -1, -1, 1, -1, 1, -1, -1, 1, 1,
        -1, -1, -1, -1, -1, -1, 1, -1, 1, 1, -1
    ],
    indices: [
        0, 1, 2, 0, 2, 3,            // front
        4, 5, 6, 4, 6, 7,            // right
        8, 9, 10, 8, 10, 11,         // top
        12, 13, 14, 12, 14, 15,      // left
        16, 17, 18, 16, 18, 19,      // bottom
        20, 21, 22, 20, 22, 23
    ],
});

// Create table legs with cap materials
sceneModel.createMesh({
    id: "redLegMesh",
    geometryId: "myBoxGeometry",
    position: [-4, -6, -4],
    scale: [1, 3, 1],
    rotation: [0, 0, 0],
    color: [1, 0.3, 0.3],
});

sceneModel.createEntity({
    id: "redLeg",
    meshIds: ["redLegMesh"],
    isObject: true,
}).capMaterial = new PhongMaterial(viewer.scene, {
    diffuse: [1, 0.3, 0.3],
    backfaces: true,
});

sceneModel.createMesh({
    id: "greenLegMesh",
    geometryId: "myBoxGeometry",
    position: [4, -6, -4],
    scale: [1, 3, 1],
    rotation: [0, 0, 0],
    color: [0.3, 1.0, 0.3]
});

sceneModel.createEntity({
    id: "greenLeg",
    meshIds: ["greenLegMesh"],
    isObject: true,
}).capMaterial = new PhongMaterial(viewer.scene, {
    diffuse: [0.3, 1.0, 0.3],
    backfaces: true,
});

sceneModel.createMesh({
    id: "blueLegMesh",
    geometryId: "myBoxGeometry",
    position: [4, -6, 4],
    scale: [1, 3, 1],
    rotation: [0, 0, 0],
    color: [0.3, 0.3, 1.0]
});

sceneModel.createEntity({
    id: "blueLeg",
    meshIds: ["blueLegMesh"],
    isObject: true,
}).capMaterial = new PhongMaterial(viewer.scene, {
    diffuse: [0.3, 0.3, 1.0],
    backfaces: true,
});

sceneModel.createMesh({
    id: "yellowLegMesh",
    geometryId: "myBoxGeometry",
    position: [-4, -6, 4],
    scale: [1, 3, 1],
    rotation: [0, 0, 0],
    color: [1.0, 1.0, 0.0]
});

sceneModel.createEntity({
    id: "yellowLeg",
    meshIds: ["yellowLegMesh"],
    isObject: true,
}).capMaterial = new PhongMaterial(viewer.scene, {
    diffuse: [1.0, 1.0, 0.0],
    backfaces: true,
});

// Create table top with textured cap material
sceneModel.createMesh({
    id: "purpleTableTopMesh",
    geometryId: "myBoxGeometry",
    position: [0, -3, 0],
    scale: [6, 0.5, 6],
    rotation: [0, 0, 0],
    color: [1.0, 0.3, 1.0]
});

sceneModel.createEntity({
    id: "purpleTableTop",
    meshIds: ["purpleTableTopMesh"],
    isObject: true,
}).capMaterial = new PhongMaterial(viewer.scene, {
    diffuse: [1, 1, 1],
    backfaces: true,
    diffuseMap: new Texture(viewer.scene, {
        src: "../../assets/textures/diffuse/uvGrid2.jpg",
        encoding: LinearEncoding
    }),
});

sceneModel.finalize();

// Create section planes
const sectionPlanes = new SectionPlanesPlugin(viewer, {
    overviewCanvasId: "mySectionPlanesOverviewCanvas",
    overviewVisible: true,
});

const sectionPlane = sectionPlanes.createSectionPlane({
    id: "mySectionPlane",
    pos: [-2.20, 2.5, 2.3],
    dir: math.normalizeVec3([1.0, 0.01, 1])
});

sectionPlanes.showControl(sectionPlane.id);
Automatic Application
Once you've assigned a capMaterial to an entity, the hatching will automatically appear whenever that entity is sliced by any section plane in the scene. There's no need for additional configuration or plugin initialization – the system handles everything seamlessly.
This streamlined approach makes it incredibly easy to add professional-looking hatching to your sliced models, improving visual clarity and making internal structures more comprehensible at a glance.
